
With springtime just around the corner, I have had the urge to spruce up some things around the house. While shopping (my favorite pastime) I keep noticing these cute wooden signs filling up the shelves in all sorts of stores. In an effort to try my hand at a DIY project, I decided to channel my springtime sprucing-up wishes into a cute and simple DIY wooden sign.
I don’t know about your family, but in mine, finding spare pocket change in the laundry is a pretty regular discovery. We either find it ahead of time or hear the clinking sound tumbling around in the dryer; hence, the inspiration for my sign! Customization is the key to making it all yours. My sign is tailored for the laundry room, but you can use this tutorial to make one for any room in your home. Be creative!
What you will need:
- 1 Piece of Plywood or any Scrap Wood
- Measuring Tape
- Skill Saw (if wood needs to be cut down)
- Paint
- Paint Marker
- Screw Driver
- Picture Hook and Nail
- 1 Mason Jar
- 1 Metal Hose Clamp (size of clamp should be based on the size of your Mason jar)
- 1 Wood Nail
What to do:

Decide on the wood for the base. Buy it new or use those scraps of wood you may already have!
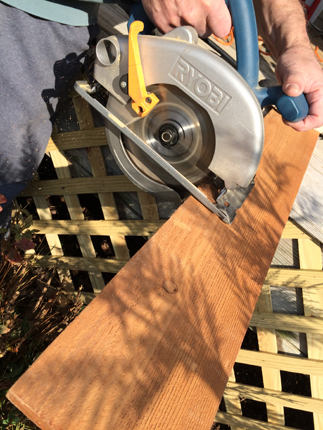
Since I had to purchase the lumber from the store I asked my dad to help me cut the piece of wood to the size I wanted using a skill saw. I measured the wood to 14” but depending on where you want to put the sign, increase or decrease the length to fit your needs.
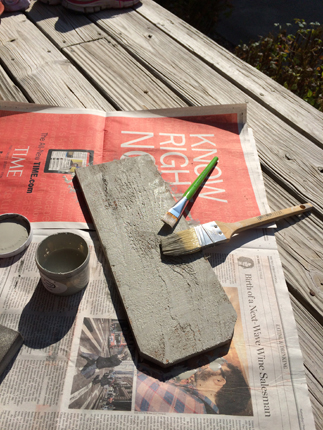
Next, paint the piece of wood. I had some leftover gray paint I decided to use.
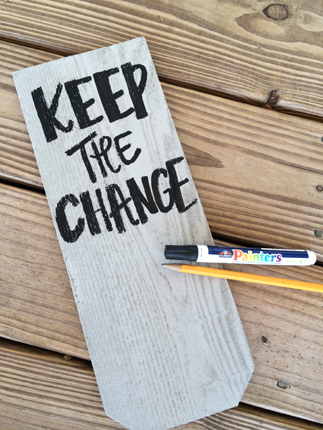
Once the sign has dried, a paint marker makes writing your tailored message easy.
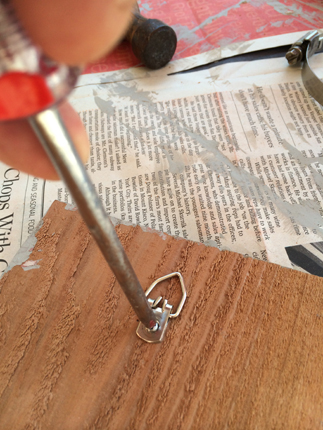
Next, if you’re planning to hang your sign, attach a picture hook to the back of the board.
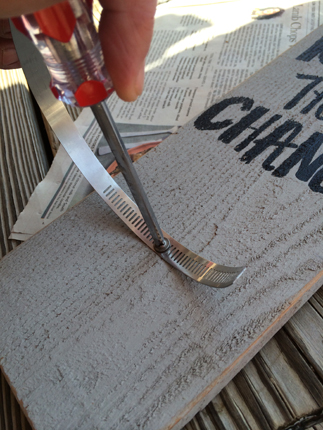
The next part can be kind of tricky so once again I recruited Dad! In order to secure the Mason jar to the sign, I used a metal hose clamp. Using a small wood nail, attach the hose clamp to the wood to ensure the hose clamp is stabilized on the wood.

After you have secured the hose clamp to the wood, place your Mason jar inside the clamp. Tighten the clamp around the jar.
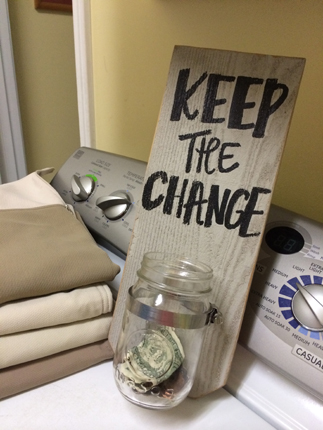
It’s that easy – your very own DIY wooden sign! I may not get rich, but then again . . . . . you never know!
Written by:
Hailey Green, Intern




Love this project!
Nice project here. Yes, change gets left in pockets, but . . . this will work great for those who have grown children who bring laundry along when they visit. Maybe they’ll put a tip in the jar to say thank you. (Probably shouldn’t hold your breath though!)
Love your change jar Hailey. It turned out great and now I want to make one too. Thanks for sharing the how-to’s. 🙂
Thanks Tracy! This project is super easy to do and for the short time we have had in our home, it has collected a good bit of change. Good luck with yours!