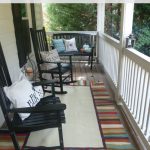
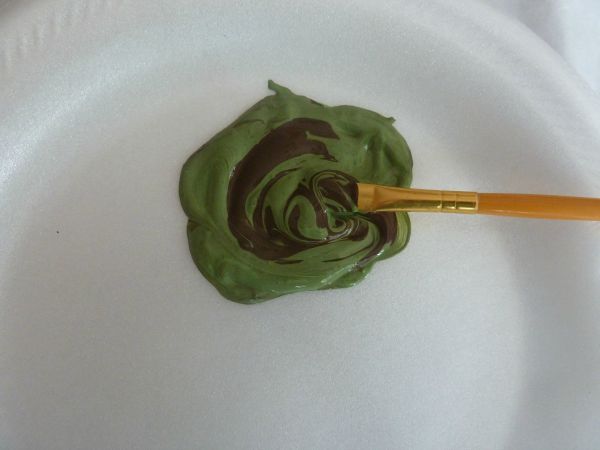
I love a good fall DIY and this year I decided to do one for my front porch. I spent a good bit of time cleaning and prepping my porch for fall, so it seemed only fitting that a fresh project should make an appearance out there.
This project took less than an hour total, but with drying time in between I finished it in an afternoon. To get started, gather your supplies…
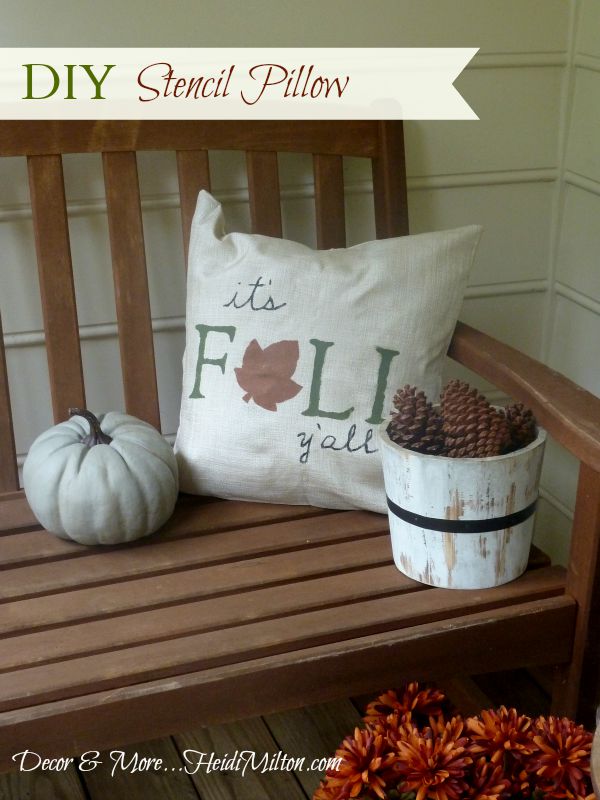
I chose letter and holiday stencils, a simple neutral pillow cover (available at your local craft store), and craft paints in your desired colors.
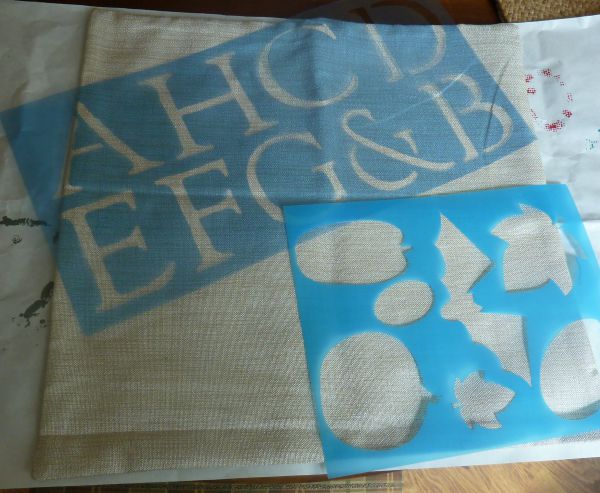
Don’t be afraid to do a custom mixed paint color if you don’t have exactly what you want in your stash… here I blended a brighter green with some dark brown.
Before you begin stenciling, place a sheet of wax paper or parchment inside your pillow cover to avoid bleeding through.
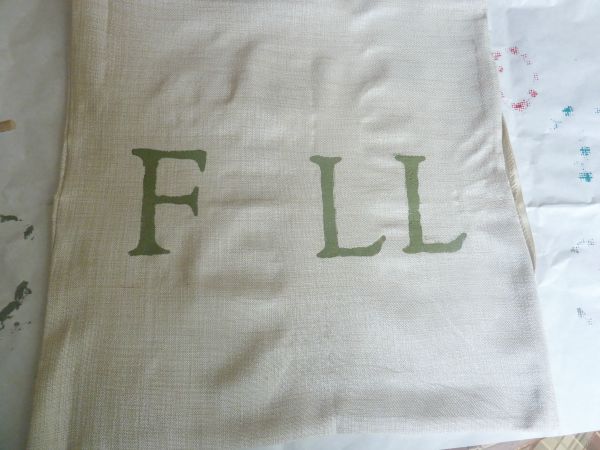
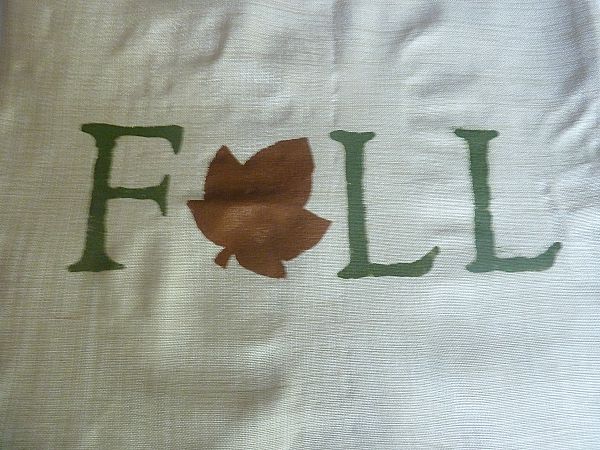
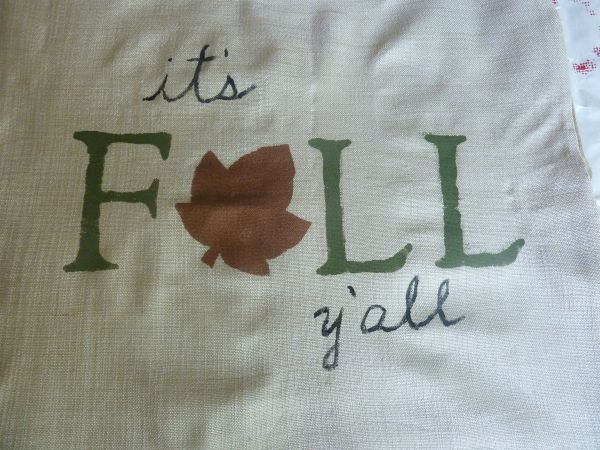
Stencil your letters first, spacing evenly, but allowing for the leaf stencil that will replace the letter A in “FALL.”
Don’t worry about some slight imperfections as you stencil… that’s part of the charm. Once your letters have dried, go ahead a stencil your leaf in place of the letter A. I used a metallic copper paint for this.
Let these dry thoroughly. For the last two words, I decided to free hand the lettering, in keeping with the imperfect charm of the pillow. But to avoid any major mishaps, I penciled them in first.
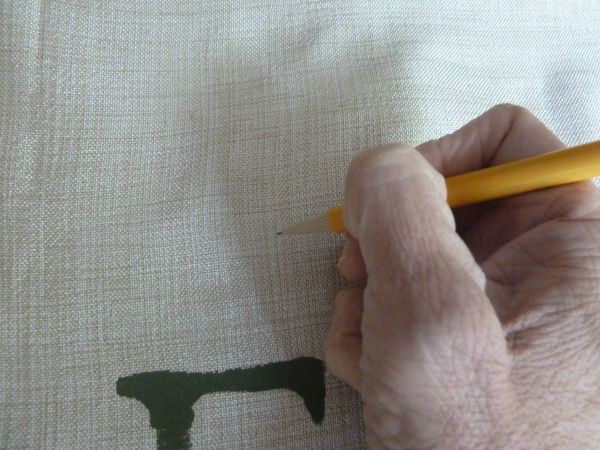
The lines are faint, but provide an excellent guide for painting. When I was ready to paint, I chose a small firm angled brush for maximum control.
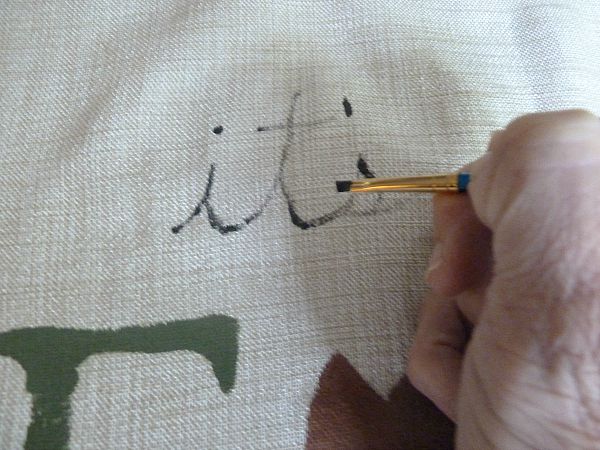
Because the fabric is woven, the paint will not go on evenly. Simply go back and fill in your lines to the desired thickness and intensity.
Allow everything to dry completely before removing the wax paper insert.
Then simply add a pillow form (also available at your local craft store) and be prepared to enjoy!
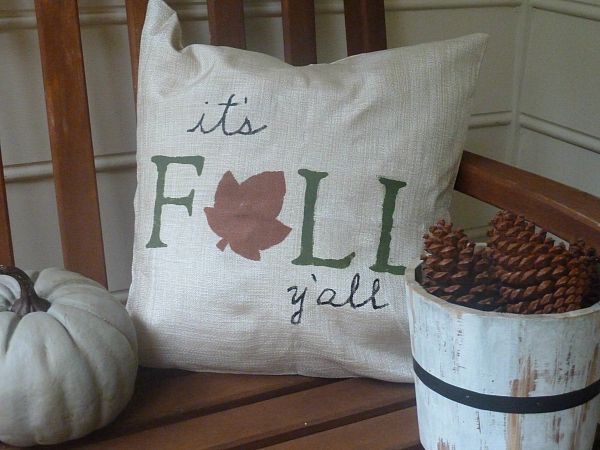
I’m blessed to have a covered porch, but this project could be enjoyed in your indoor spaces as well! Just a touch of fall whimsy for your home.
To complete the look, add a new welcome mat with complementary colors.

Floral in the Fall Welcome Doormat
Find more home decor DIY projects and inspiration on my blog, Decor & More.