DIY pallet projects are all over magazines, blogs, and Pinterest. Why? Because pallets are relatively easy to find, usually free, and made out of sturdy, rustic wood. It’s also a great way to repurpose something that might otherwise end up in a landfill.
In this post, I’m going to talk about pallets – how to find them and how to prepare them for projects – and then show you some of my favorite DIY pallet projects!
1. How to Pick a Pallet for a Project.
When I say “pallet,” what am I talking about?

I’m talking about the flat wooden platforms that you find, usually behind stores, on which equipment and large products are shipped to stores. They are usually made of pine or oak. You can tell what they are made of by the weight of the wood and by the hardness of the wood (pine is soft; oak is hard).
To find pallets, ask at your favorite stores, such as hardware stores, grocery stores, or landscape supply stores. Make sure you ask first, because many stores reuse or recycle pallets, or return them to the manufacturer from which they came. You don’t want to be stealing pallets!
Once you’ve decided you want to do a project using a wood pallet, how do you choose a pallet to use? Choose pallets that are relatively clean, don’t have oil or other substances spilled on them, and don’t have mold on or moisture in them. Also, try to find pallets that don’t have twisted nails in them, which are hard to remove.

Lastly, check the pallet for a stamp. If you see “HT” on it, that means the pallet was heat-treated, rather than chemically-treated. You should look for heat-treated, rather than chemically-treated, pallets. Some chemicals used to treat pallets are toxic. You can find a great explanation of pallet codes and other information on how to tell if a pallet is safe to use HERE.
2. How to Prepare a Pallet for a Project.
Once you’ve brought your pallets home, you have to disassemble them to get the wood ready for your project. To disassemble them, you have two choices: (1) you can use a hammer and crowbar and take them apart the “old-fashioned” way or (2) you can use a reciprocating saw (or “sawsall”).

Each approach has pluses and minuses. If you use a hammer and crowbar, the benefit is that they are easy to control, and most people already own a hammer and crowbar (or, if not, they aren’t very expensive). Also, when you use a hammer and crowbar, you remove the nails. If you don’t want nails in your wood for the project, then this is the best approach.
If you use a reciprocating saw, the benefit is that disassembly goes quickly! You can disassemble a pallet fast and really easily. The down sides are, first, you have to have a reciprocating saw and, second, when you use the saw, you cut the nails, so the nailheads and nail pieces stay in the wood. That’s fine, if that’s the look you want, but if you don’t want nails, then you probably don’t want to use this approach.
No matter which approach you use, make sure you wear safety glasses and gloves. The pallet wood is rough and it’s easy to get splinters.
Before using the pallet wood, make sure to clean it well with a diluted bleach/water mix. Rinse it well and let dry completely. The bleach will kill mold, mildew, and bacteria in and on the wood.
Once the wood is dry, give it a good sanding to make it smooth. Start with 60- or 80-grit sandpaper, then move to 100- or 120-grit sandpaper to make the surface smooth.
3. DIY Pallet Projects that Rock.
Here are some of my favorite pallet projects.
For a smaller pallet project, try making a sign, like this one from The Kim Six Fix:

Dark stain and light paint in a stenciled pattern make for a beautiful rustic sign for Thanksgiving.
For more rustic decor ideas, please see THIS POST.
For a bigger project, The Thinking Closet made a headboard from pallet wood.

I love this rustic headboard! Just make sure to sand the wood down well for this project so that you don’t scratch or scrape yourself when you lie down to sleep!
It’s easy to turn a pallet into an herb garden:

That bright green paint on the pallet is perfect with the green herbs and terra cotta pots. PinkWhen added shelves and feet to the pallet for this standing herb garden.
For more herb garden ideas, please see THIS POST.
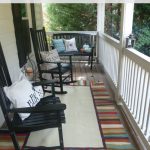
If you want to go really big, try this pallet porch swinging bed:

I really want one of these for our porch! Can you believe it was made from pallets?
For more porch decorating ideas, please see THIS POST.
Have you made anything out of pallet wood? Share in the comments!